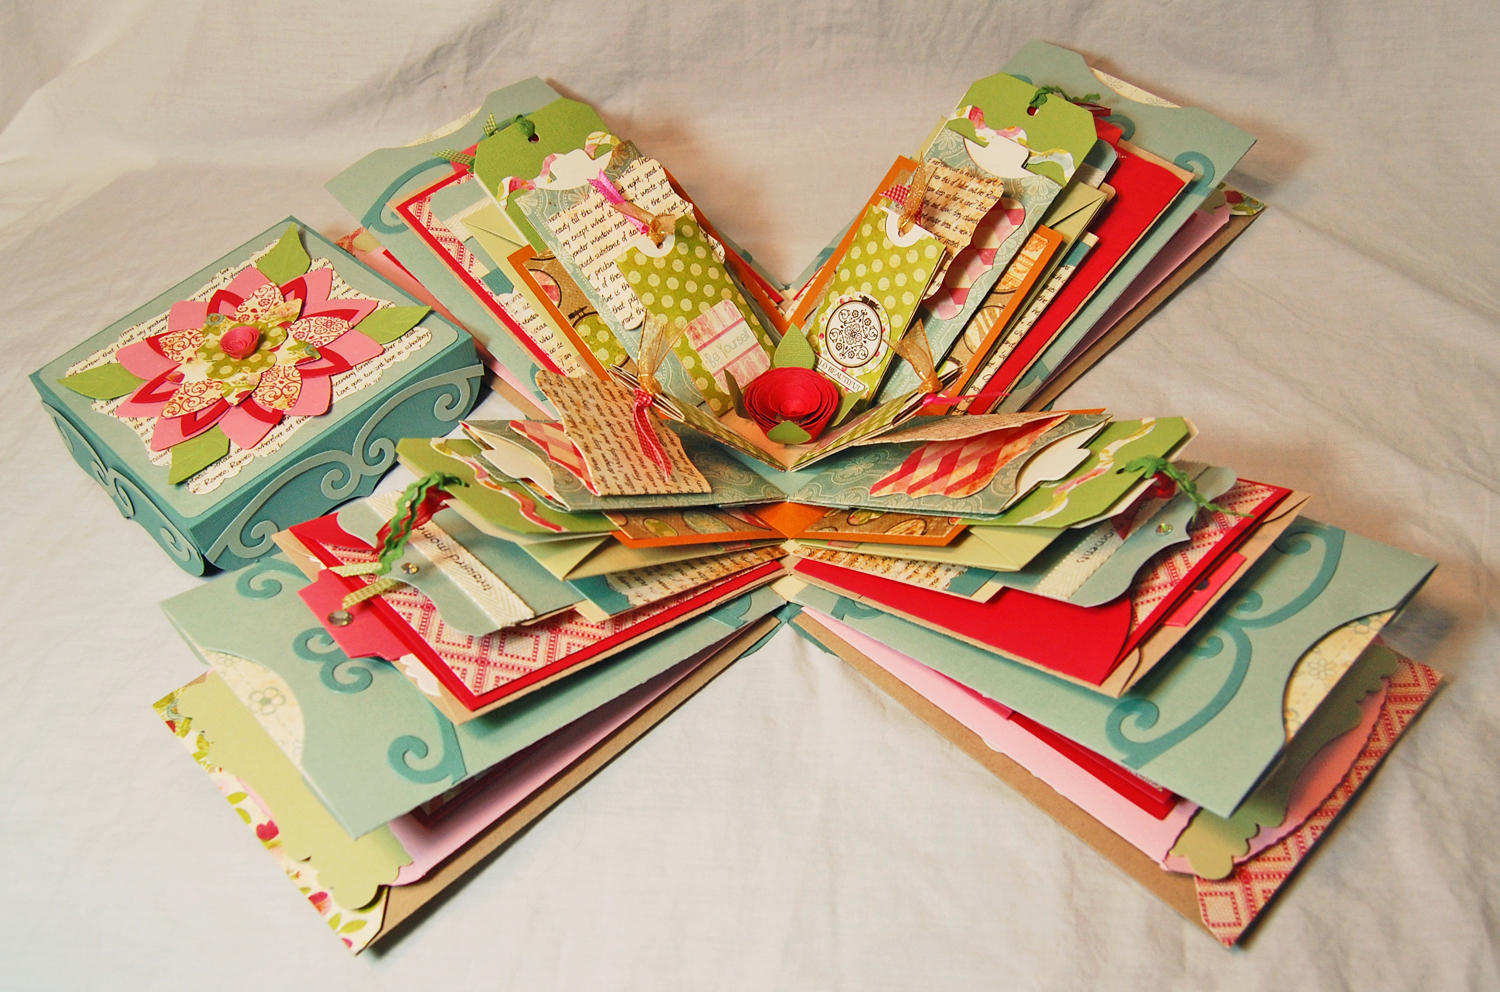
Hold on to your britches! This is a long post. Whew! I just made my entry into the 2014 AccuCut Craft GrandeMARK Challenge by the skin of my teeth. There were literally seconds to go before the contest was closed on May 4th. But I finished!!
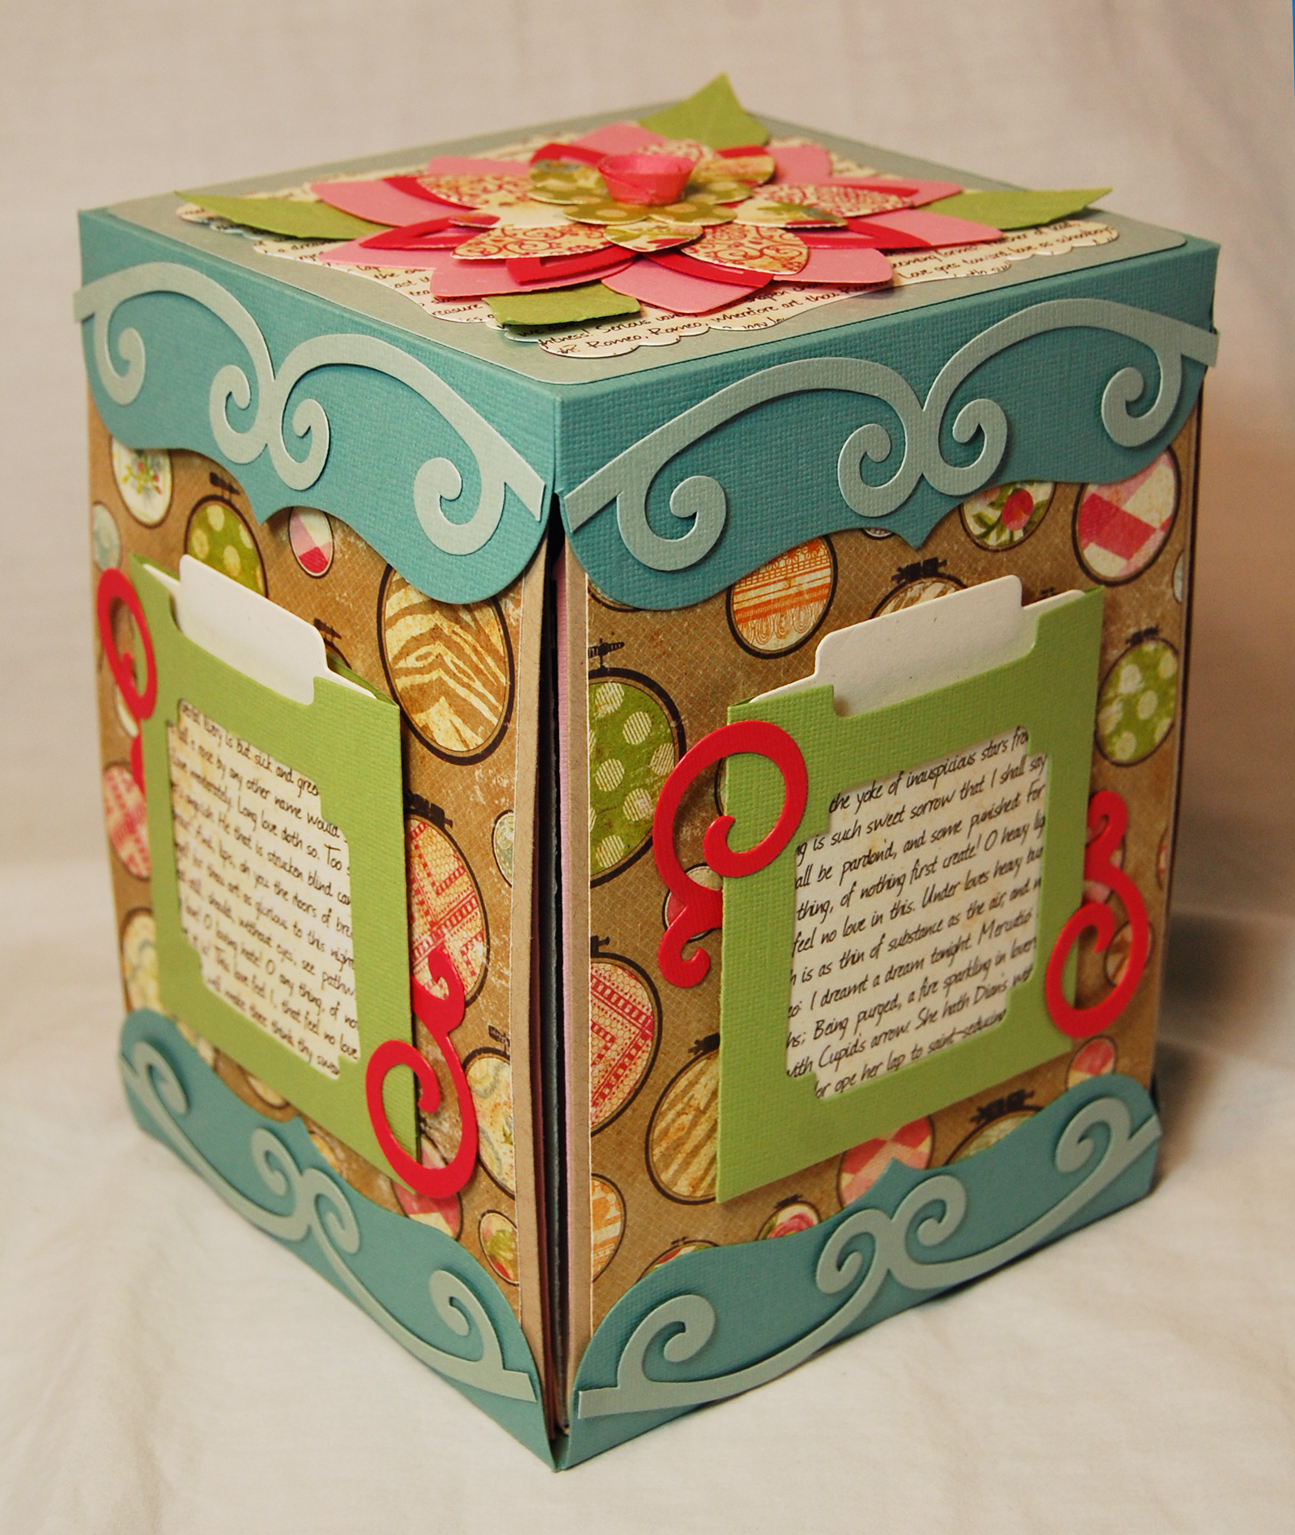
Envelope & Pocket Explosion Box
The Story
Having seen contest entries from previous years, I had in the back of my mind that I wanted to be sure and enter the GrandeMARK challenge this year. So when I received the AccuCut Craft email on April 1st, officially opening the contest, I mulled over ideas for a few days, and then started plotting out what I wanted to use to make a unique explosion box:
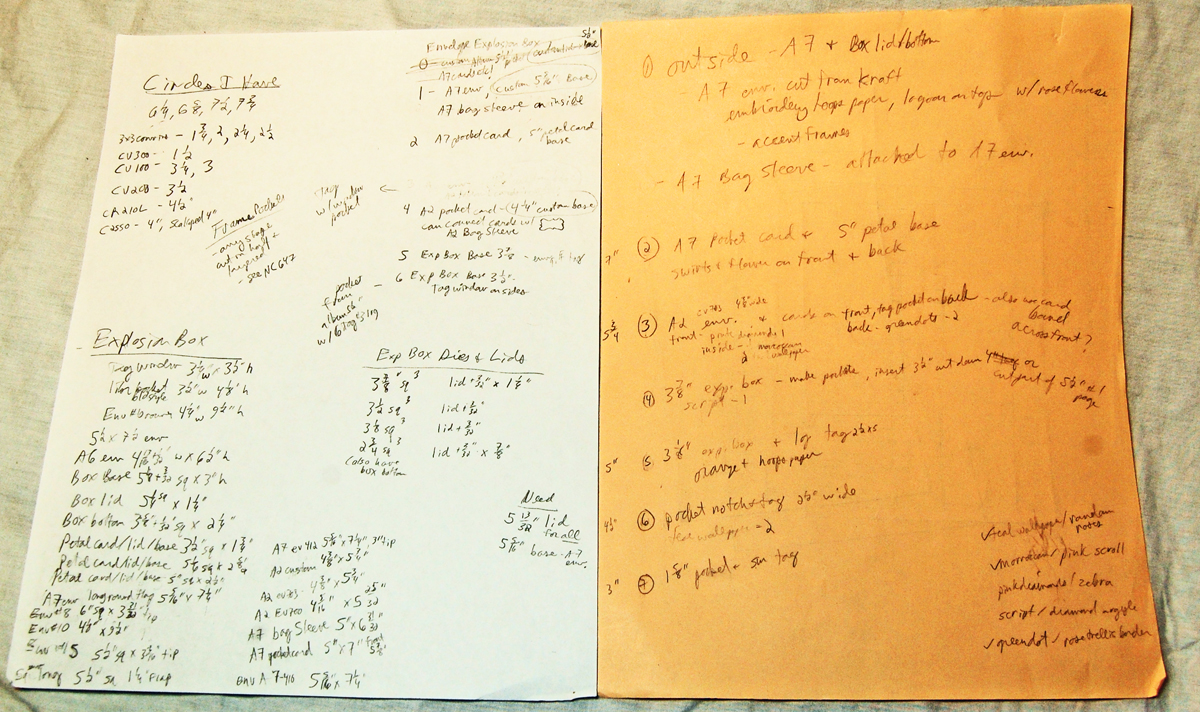
I started by going through my dies and writing down a list of envelope, card, and pocket dies that could be incorporated into an explosion box. I measured, considered, and wrote a prototype list (white paper above) of how the box could go together. At about that point, I got the highly-anticipated email from AccuCut Craft announcing their spring 50%-off-all-dies sale that I live for every year. Eureka! I just knew I could get some great dies (particularly the flowers) to accent and build the box layers. Also, I planned out a few custom dies and submitted an order to AccuCut’s Custom Shape Pros department to help me build the box. I knew I’d be cutting it close!! I received my shipment of AccuCut dies on Thursday, May 1st, and the custom dies on Friday, May 2nd. By the time I assembled the parts of my project in one place, I had just two days to decide on paper and exact construction for all the layers, and plotted out a second paper for each layer (peach paper above.) My family didn’t see much of me for those two days. Thanks to my husband for keeping the kids fed and occupied! My craft room was a war zone of stacked dies and paper scraps by the time I was finished. It was dangerous to walk in there.
I chose Bazzill Basics Vintage Lace paper collection and selected coordinating cardstock colors in my project:
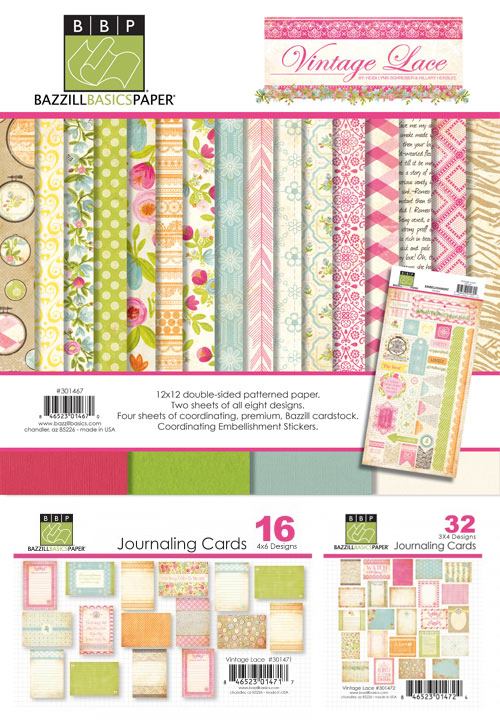
Additional Bazzill Basics cardstock colors used:
Berry Blush, Piglet, Passionate, Berrylicious, Marigold, Palm (retired color, Pear could be used as a substitute,) Parakeet, Hillary, Aqua, Lagoon, Sawdust, and Kraft. Both Sawdust and Kraft have the wonderful fiber flecks in them.
Cream cardstock with tiny fiber flecks – French Paper Co. Speckletone True White. This is absolutely my FAVORITE cardstock for doing mats in cards and for tag projects. It’s similar to Bazzill Basics Sawdust and Kraft (which are probably also made by French Paper Co, but I’m not sure), but True White is a wonderful off-white color and bridges both bold saturated colors and neutral tones. I would LOVE it if Bazzill Basics would add True White to their paper line (hint, hint!)
Now let’s analyze the project layer by layer:
Outside
Dies used:
Box lid & base – custom die designed by me and made by Custom Shape Pros. The measurements are – square base is 5-7/16″ square, flaps are 5-7/16″ x 1-1/2″. To understand how a box lid generally goes together, take a look at one of AccuCut’s box lids – Box #6. For the box lid for this project, cut a square that is 8-7/16″ square, make score marks at 1-1/2″ and at 6-15/16″. Turn it 90 degrees, and make those score marks again. You will have four 1-1/2″ squares at each corner. Using AccuCut’s Box #6 as a quide, make little notched flaps out of those four corners. You have the large center square, the little notched folding flaps, and the four long rectangular side flaps. You can cut a decorative edge out of the four long side flaps, or leave them with a straight edge. If you do cut a decorative edge, you’ll notice that you lose some of the little folding flaps. They do get shorter, but be careful not to cut them completely off. You can see how the little folding flaps on a box lid with a decorative edge looks unfolded by looking at AccuCut’s Box #26 or AccuCut’s Box #21 Tops #3. I highly recommend you do a test-run of the design on cheap paper before using your final cardstock or patterned paper. The box base is just like the lid, except you will completely cut off the little flaps, then glue the envelopes to the inside of each rectangular side flap. Glue them very close the the fold line of the center square, but leave a scant 1/16″ distance from the bottom of the envelope to the fold line.
A7 Envelope #4 – sides of the outer box layer
Border – Flourish – decorative scrollwork on the lid & base
Pocket Window & Tag #1 – green pocket & tag on the sides
Flourishes #1 – dark pink flourishes on the sides of the pockets
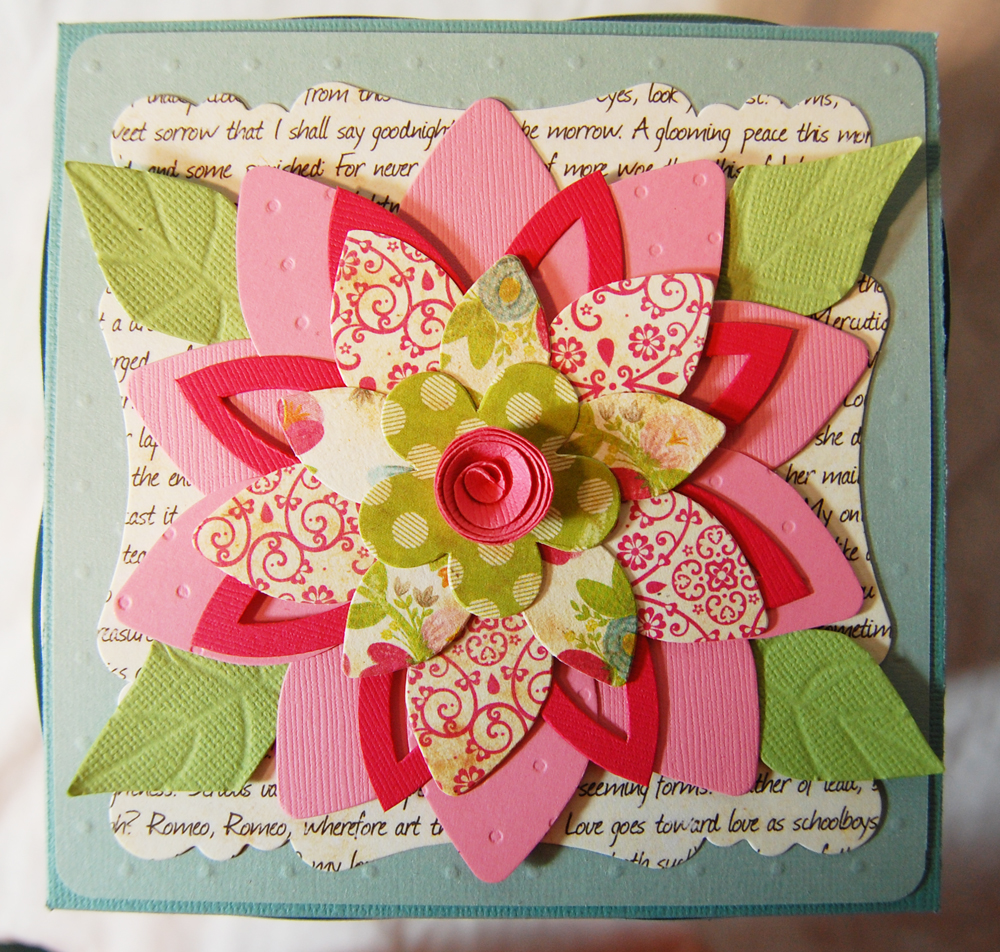
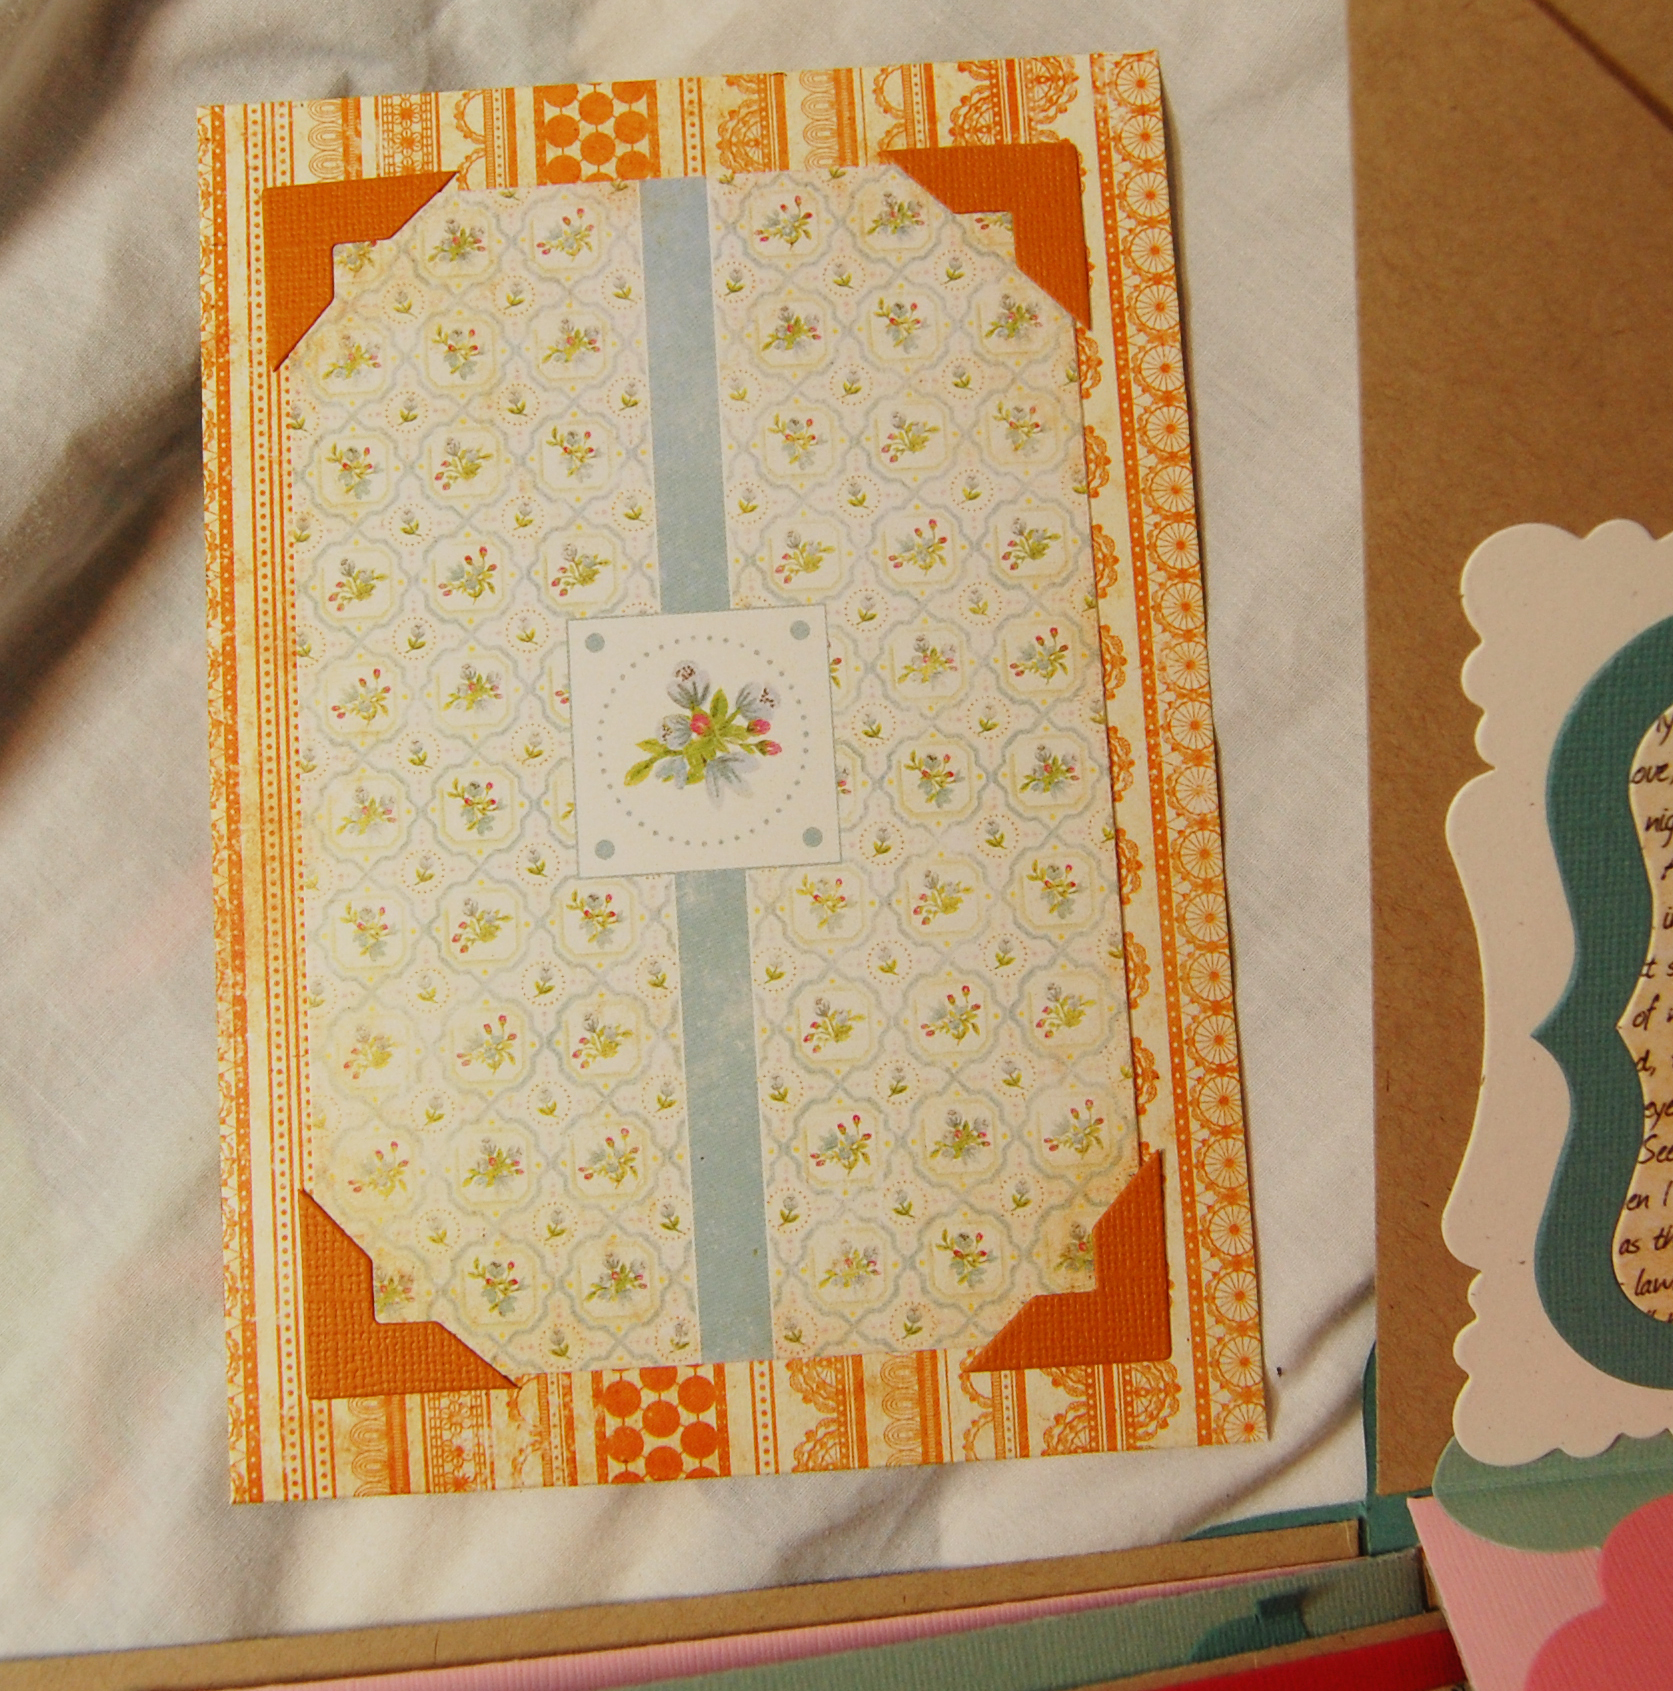
Top of Lid
Dies used:
Polka Dots Texture Plate – I embossed the outer mat and one of the pink layers of flowers with the dots plate
Square Card Mats – the printed word mat
Holiday Flowers – I used this shape to make the leaves. I also used an embossing stylus and drew veins on the leaves.
Flowers #6 – Largest flower layers, medium pink
Flowers #29 – dark pink flowers
The next few layers are also Flowers #6
Flowers #21 – the green polka dot flower
Spiral Flowers – the 3d rosebud in the middle
Layer 1
This layer has many sublayers. Dies used:
A7 Envelope #4 – sides of the outer box layer and is also the first inside layer
Square Card Mats – the cream-colored mat
Antique Accents – the antique frame and inside mat
A7 Cards Frame – the medium pink mat on the back side of the A7 bag sleeve
I hinged the sublayer on the right to the A7 envelope with solid mat/frame from the Nameplates #12 die.
A7 Jacket Card #3 – inside the A7 envelope is a pullout card.
A7 Cards Victorian – mat inside the A7 Jacket Card
Photo Corners #1 – accents on the mat
Nameplates #12 – decorative frame on the front of the A7 jacket card
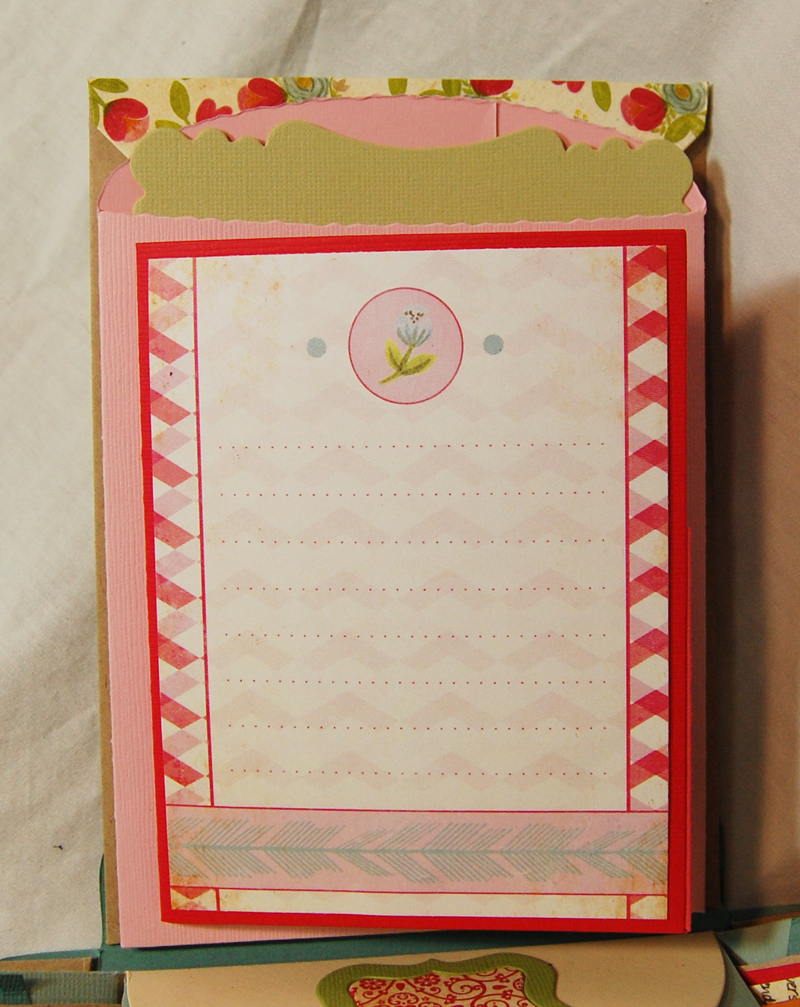
A2 Card Mats Rounded – on the backside of the A7 victorian mat is a journaling/photo card, stamped with Hero Arts CG526 Large Notebook Paper stamp.
Border Ribbon – decorates the bottom of the mat/card
On the backside of the A7 jacket card is a 4×6 journaling card. In the explosion box, there are four sides, which means four different journaling cards.
Bag Sleeve – the light pink pocket
A7 Cards Victorian – mat inside the A7 bag sleeve
A2 Card Convertibles – mounted on the front of the A7 bag sleeve
The front of the card has a trimmed 4×6 journaling card, each side of the box layer has a different card.
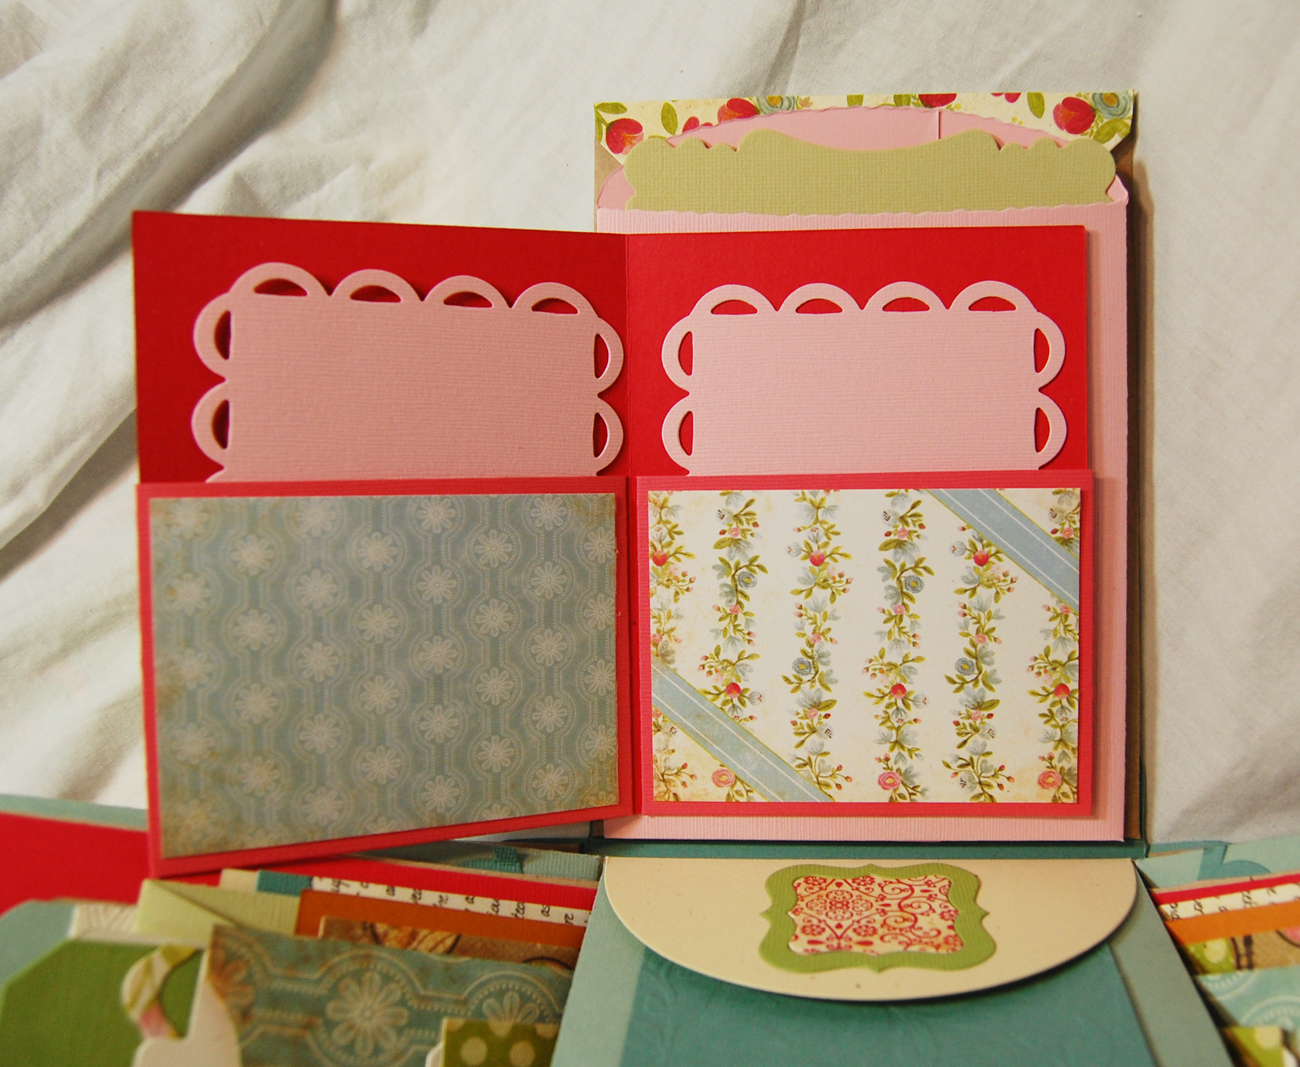
A2 Card Pocket Tag – The inside pockets of the card. I only die cut the pocket portion, then glued it to the A2 card.
A2 Card Mats – cute ribbon-edged pullout mats on the inside of the card
3×4 journaling cards on the front of the pockets
Layer 2
Dies used:
Notecard Petal #1 – this is the box base for Layer 2, the half-circles also make a pocket for a pullout tag
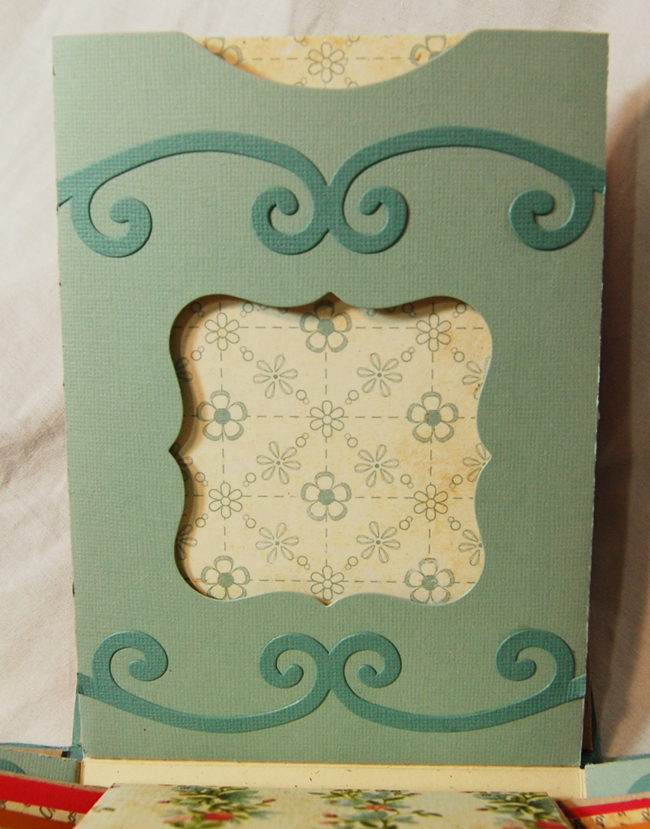
A7 Convertibles Pocket Card – this is the main card attached to the petal card base, the pullout card is also part of the die set
Convertibles Frame Insert – this goes inside of the A7 pocket card die, so that it makes a window when the card is cut out.
Border – Flourish – decorative scrollwork on the front of the card
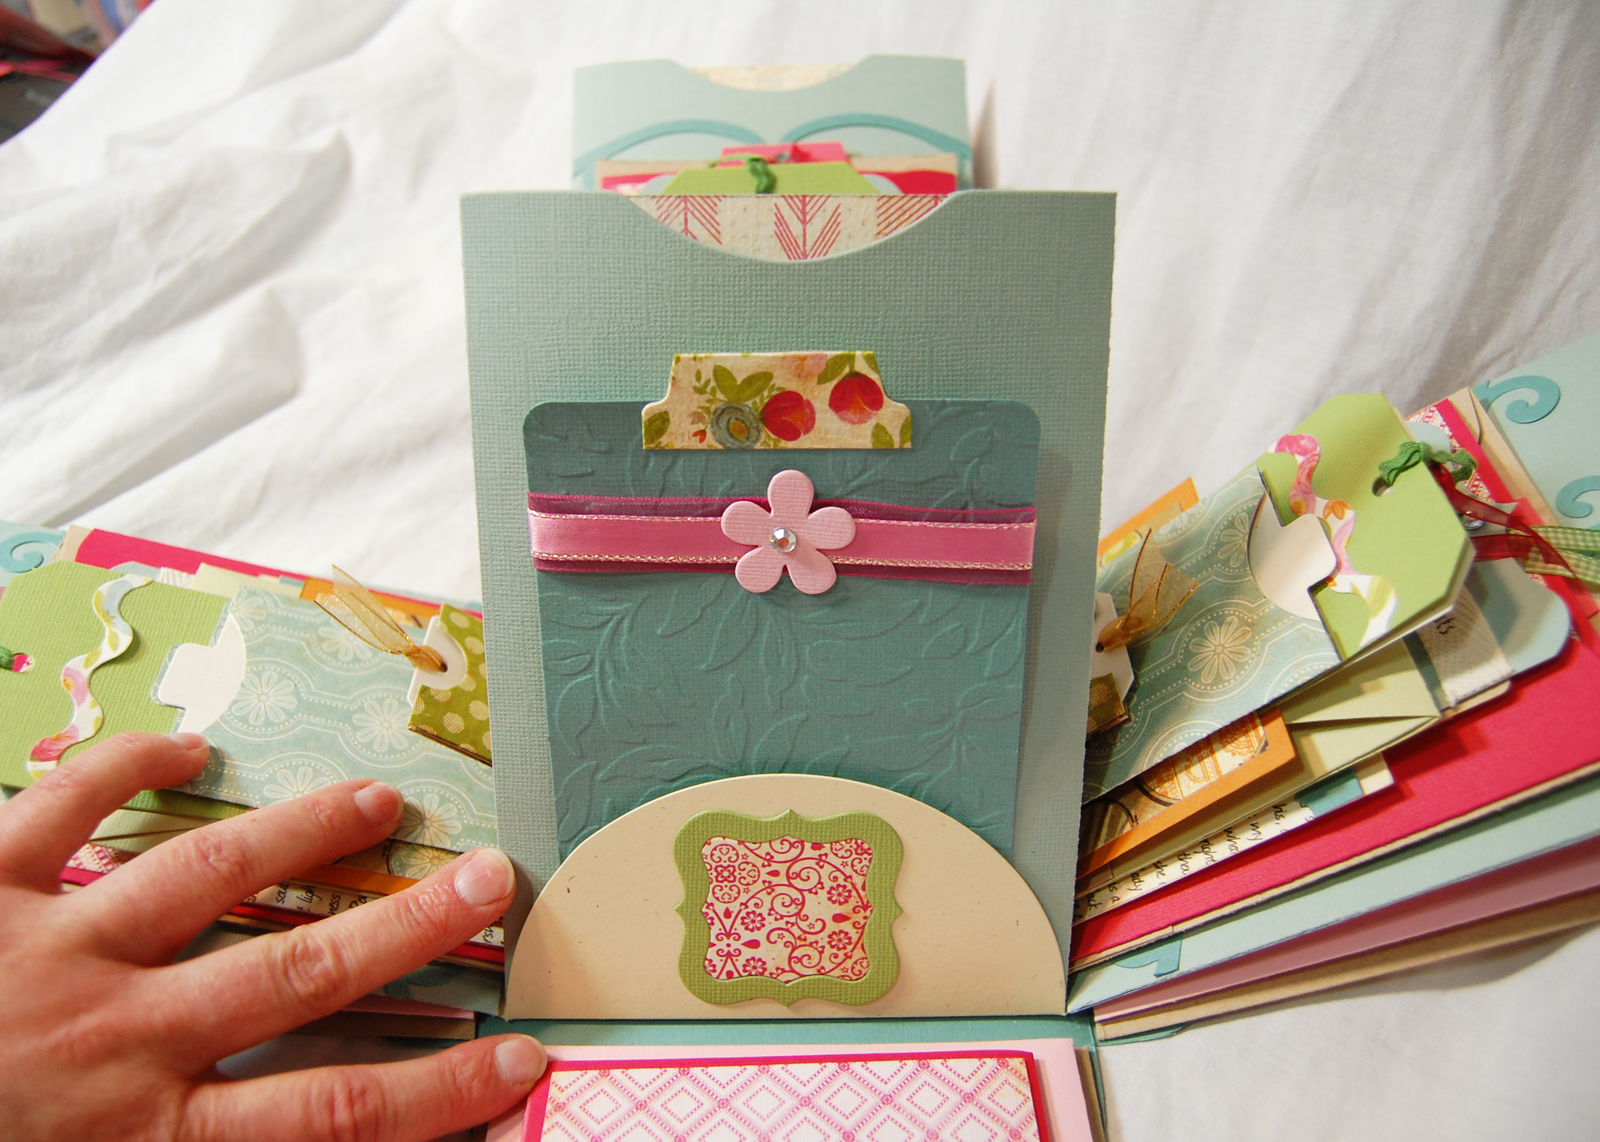
A2 Card Mats Rounded – the pullout tag at the back of the card
Leaf Texture Plate – the embossed texture on the pullout tag
AccuCut Zip’e Slim Tabs 42114 – retired die, has the tab shape that is at the top of the pullout tag
Flowers #26 – The little pink flower at the top of the tag
Antique Accents – the little green antique frame on the half-circle shape of the petal card base
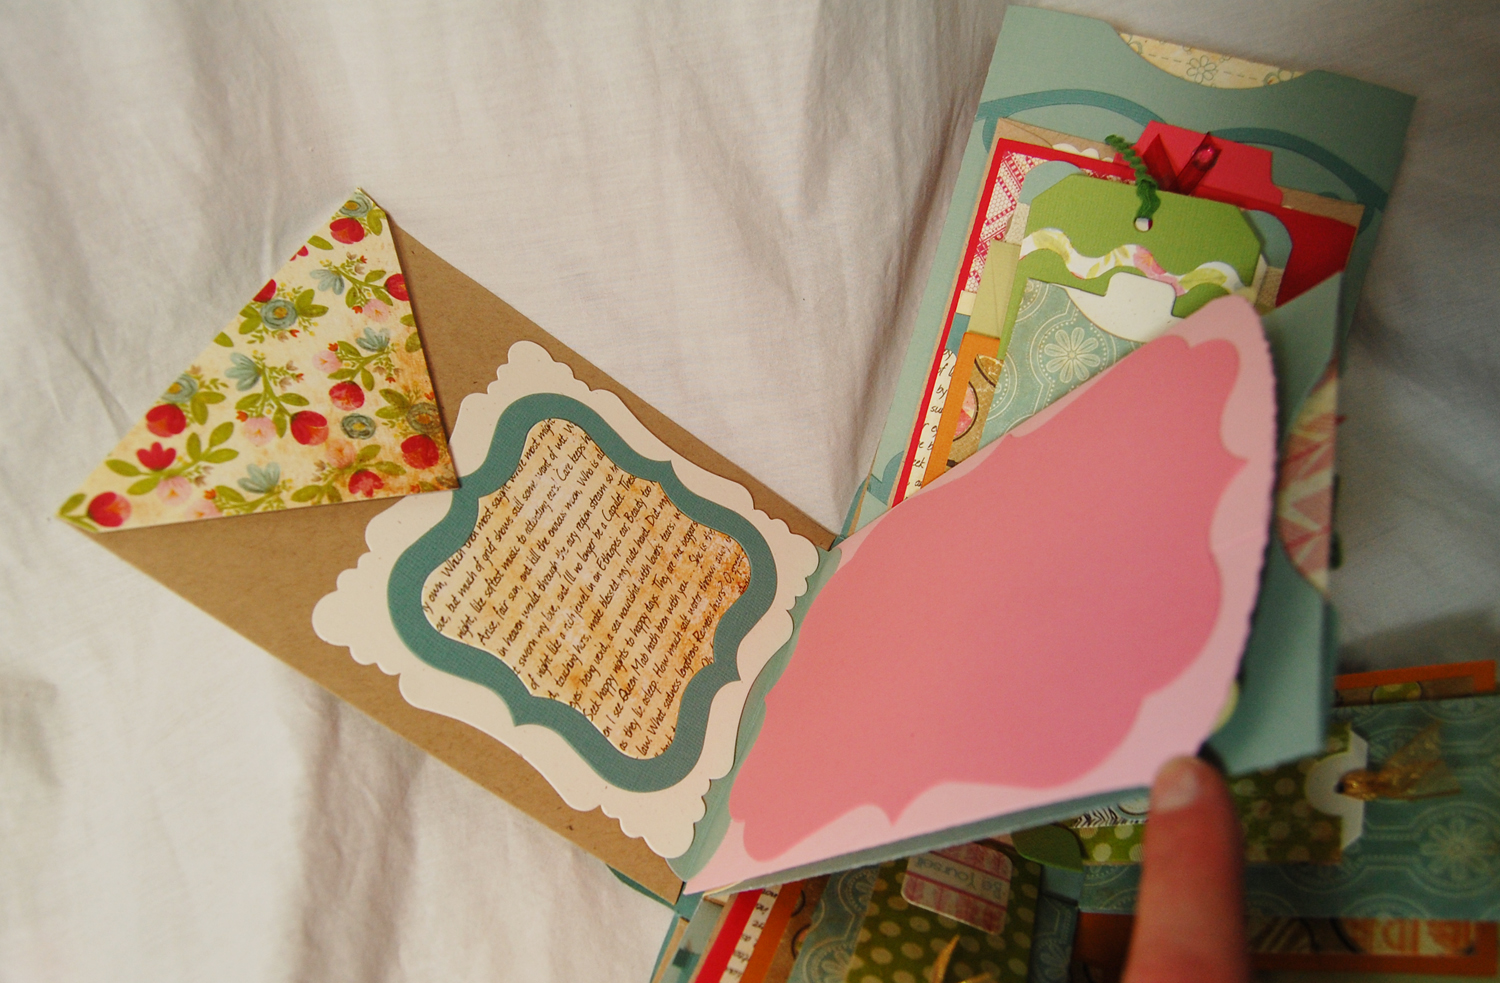
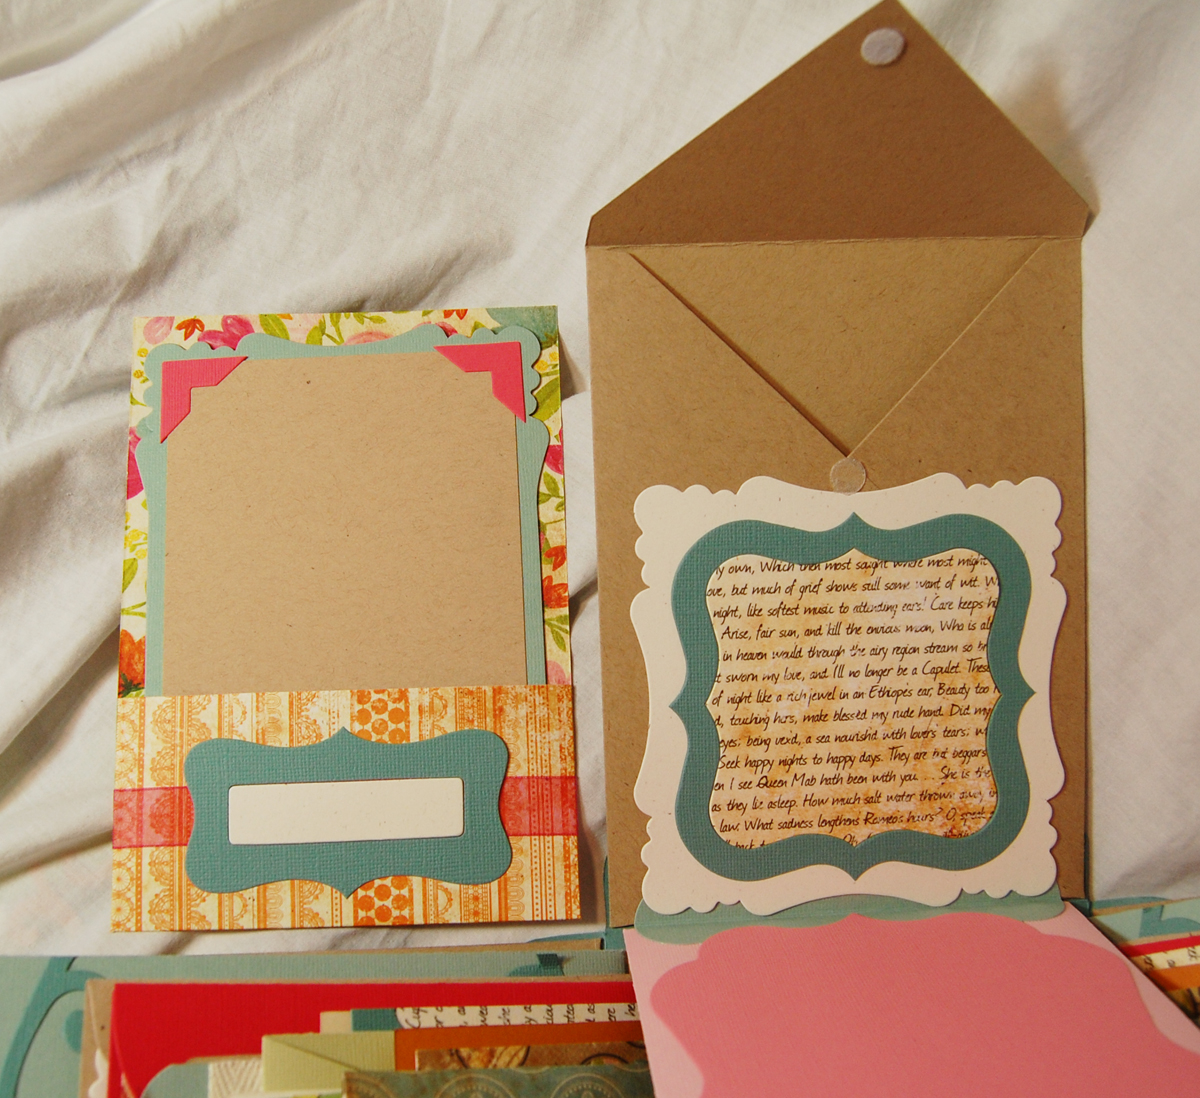
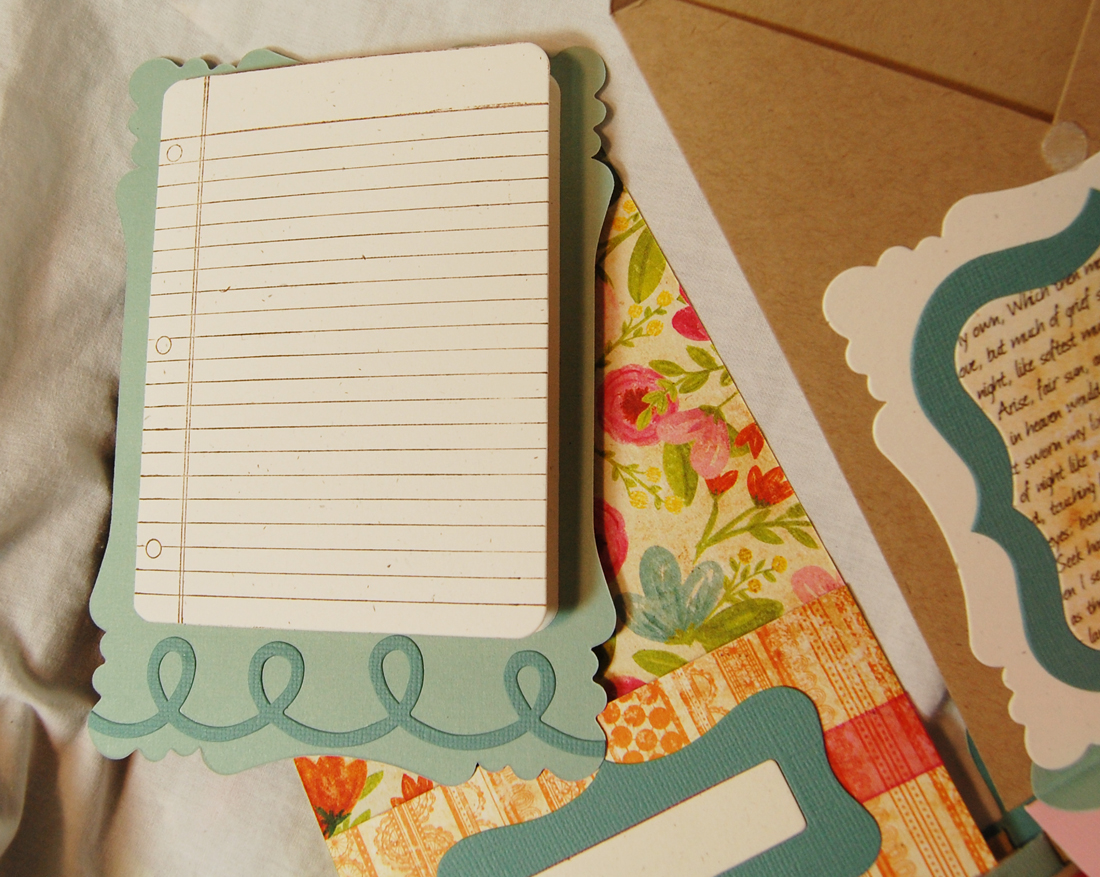
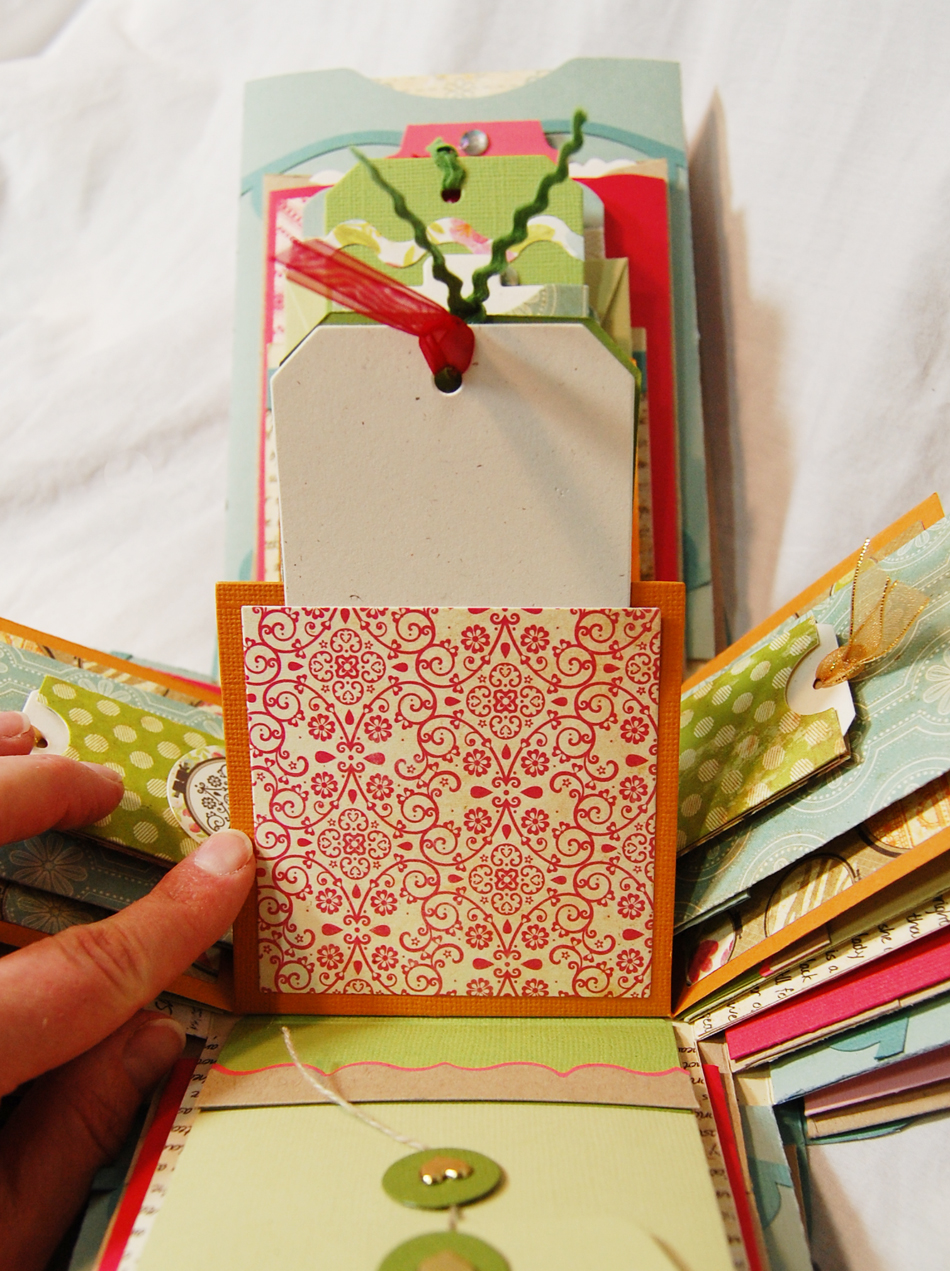
Layer 3
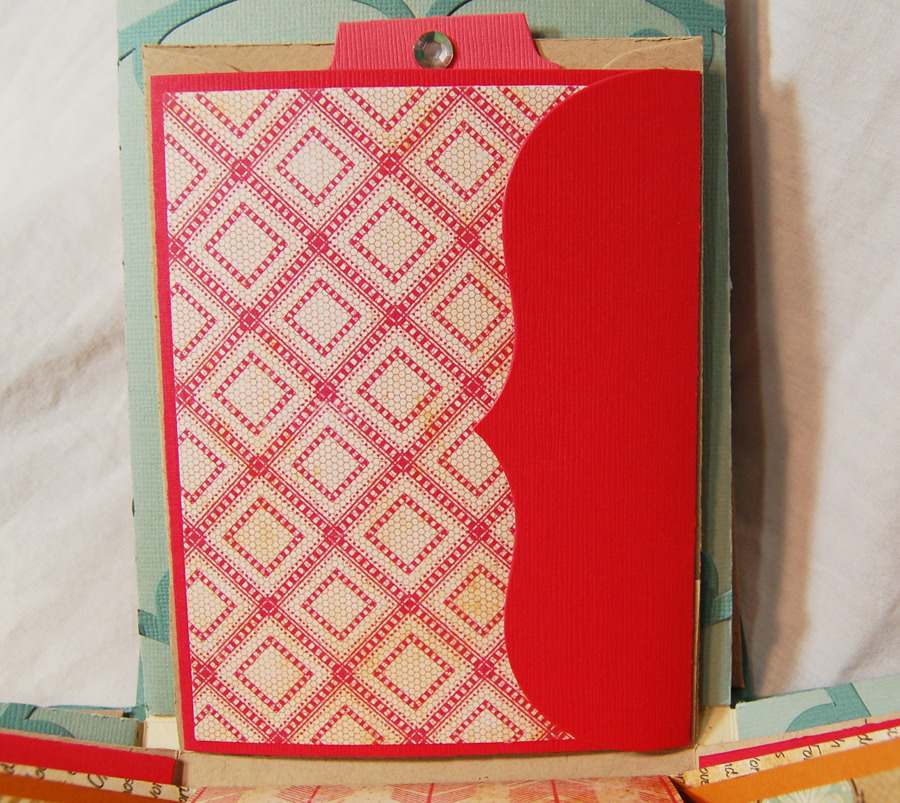
Layer 3 box base – I hand-cut this with my Scor-Pal Scor board. First I cut a square 7-3/8″, then scored it at 1-1/2″ and at 5-7/8″, turned it 90 degrees and scored it at the same measurements. Then with scissors I cut out the four corners. This will give you an explosion box base that is 4-3/8″ (matches the A2 envelope width), and the four flaps are 1-1/2″ x 4-3/8″.
A2 Envelope #4 – this is the main shape glued to the Layer 3 box base. Cut from tan kraft cardstock, it is sandwiched in the middle of the A2 card shapes and almost disappears. I cut off one of the flaps to create an open pocket
A2 Card Foldout #3 – this is the dark pink (Bazzill Basics Berrylicious) card on the front of the envelope
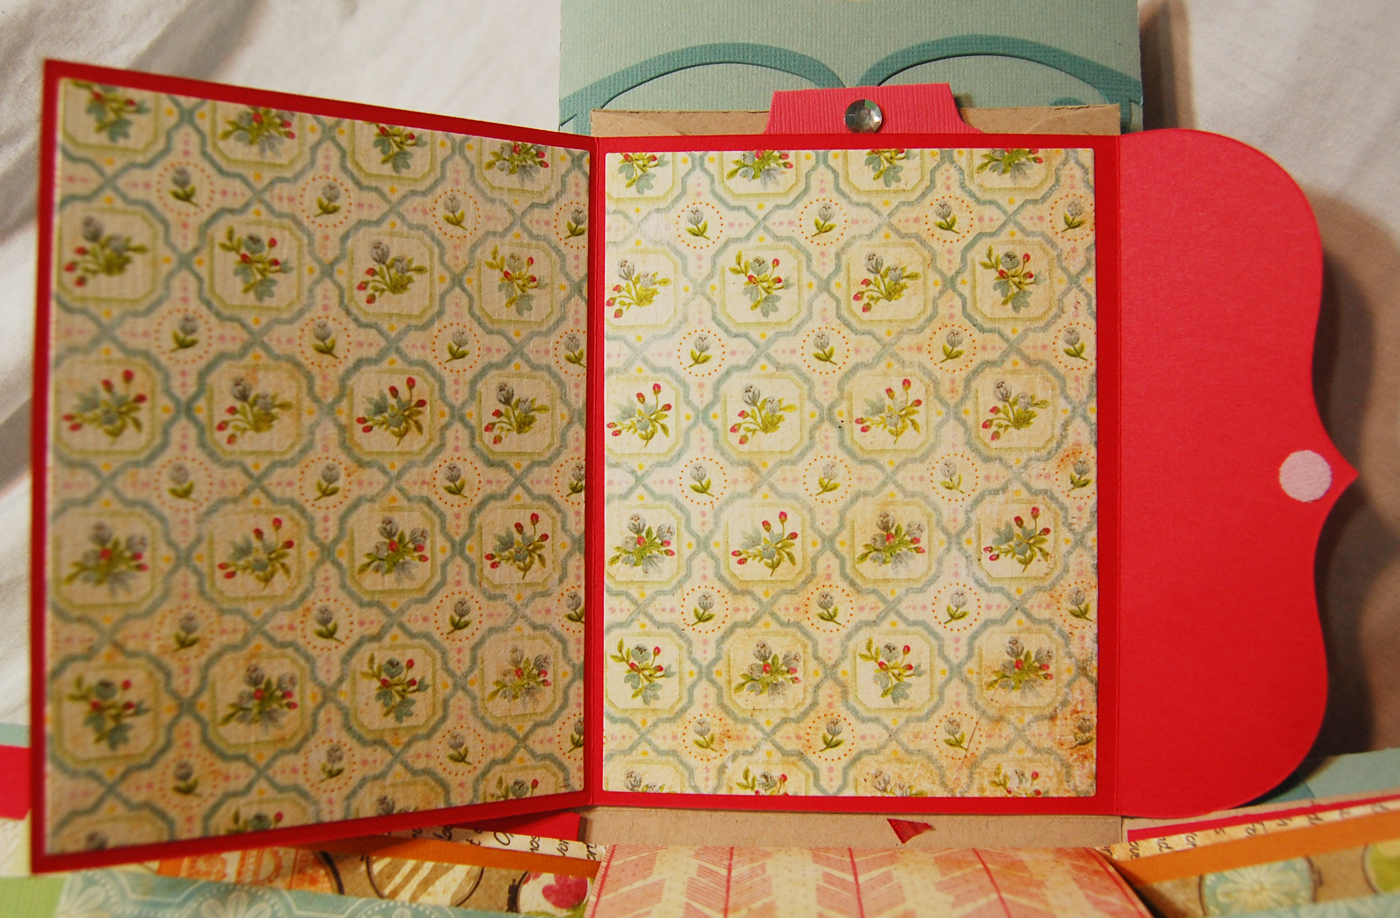
A view of the opened card. I LOVE, LOVE the velcro dot closure, and use it a lot on my cards and other projects. You can find them in my eBay store – Becky’s Craftroom
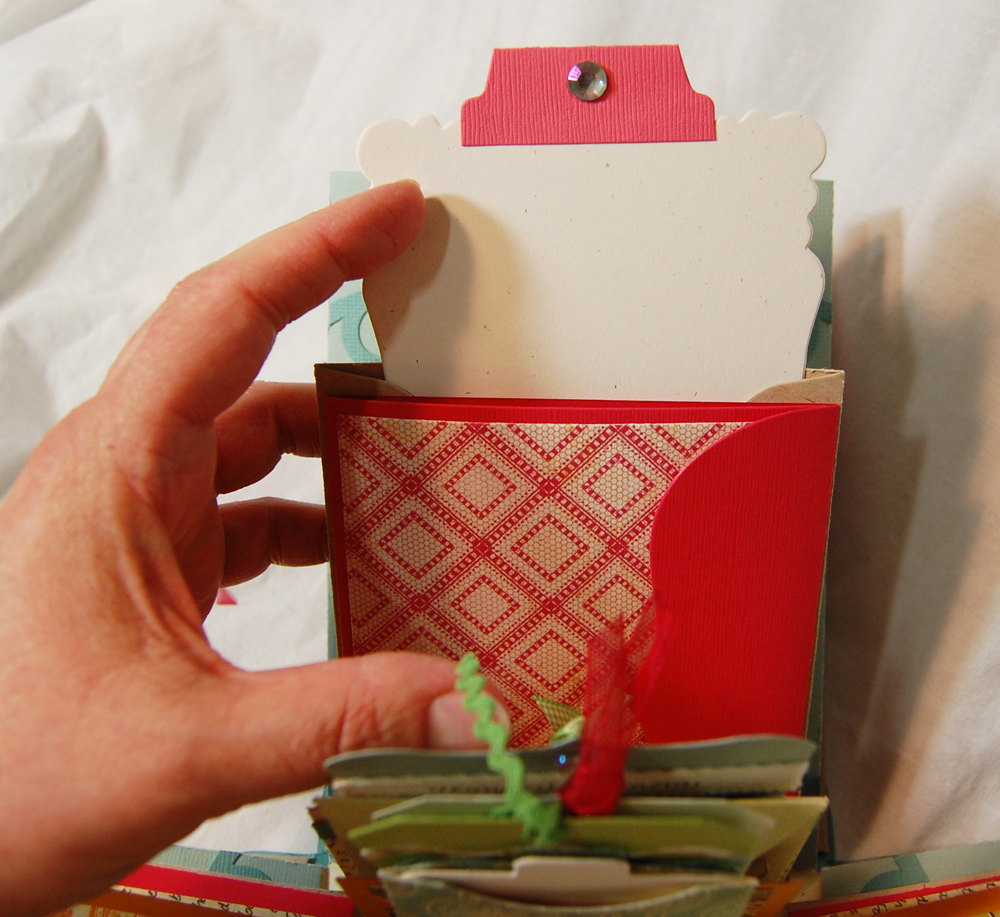
A2 Card Mats – the cream pullout mat. The retired AccuCut Zip’e Slim Tabs shape is on top.
A2 Card Pocket & Tag – on the backside of the tan/kraft A2 envelope is mounted this card shape with the pullout tag
Border Crown #2 – decorative edge on the pocket
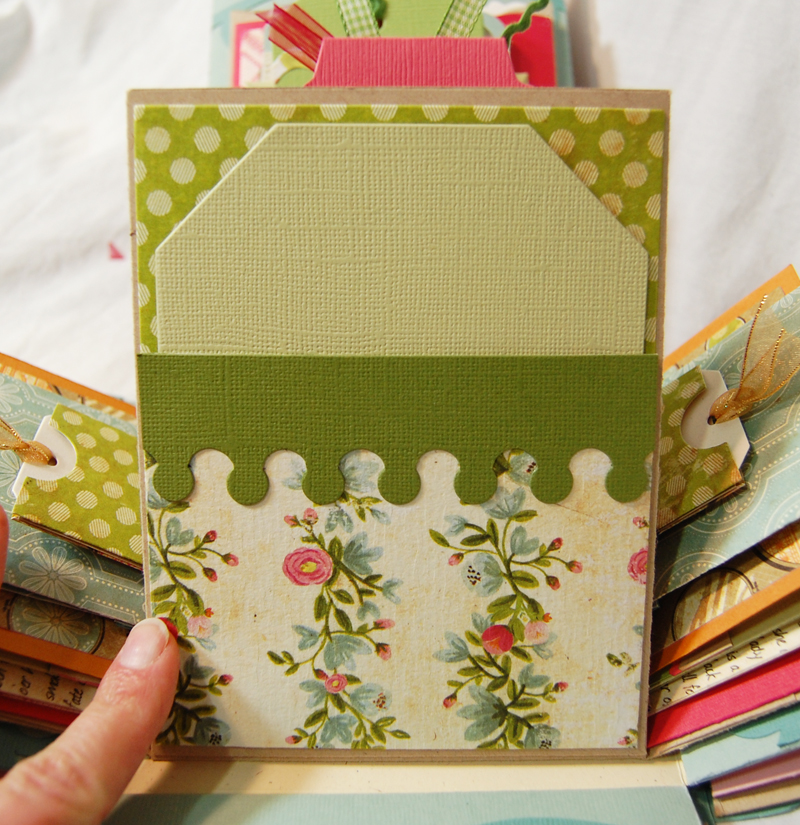
Layer 4
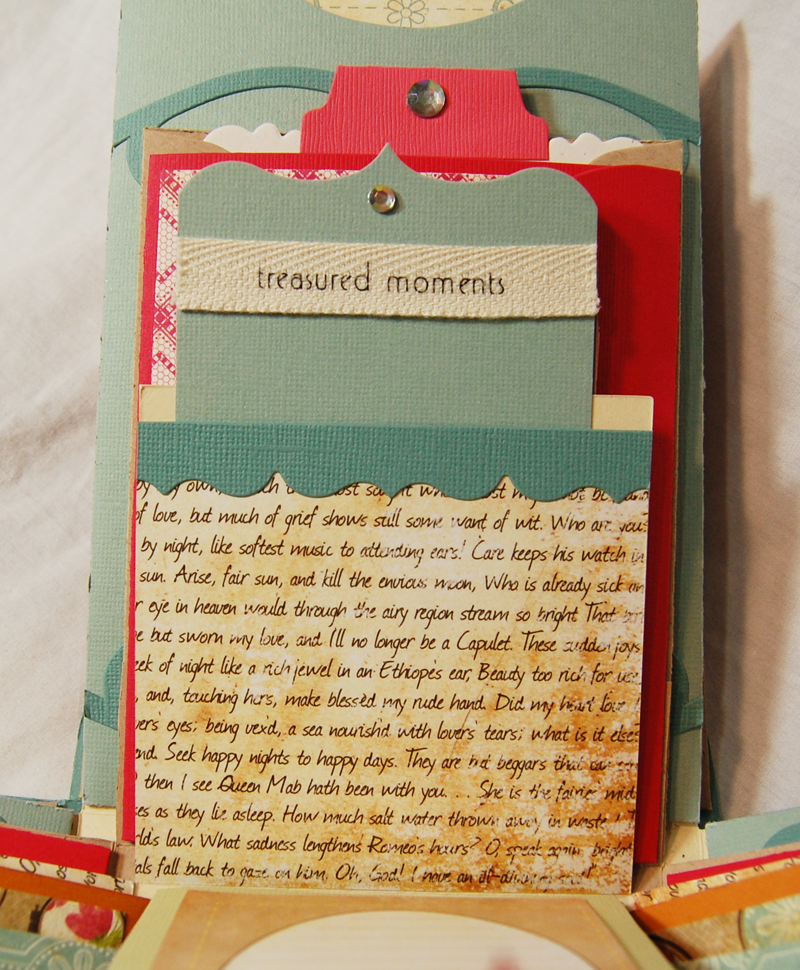
Explosion Box – Outer Bottom – This is the Layer 4 box base. I die cut the box bottom, then die cut the 3-7/8″ square sides to form the pockets for the front and back of each side of the box. The front pocket was trimmed 1/4″ off the top, the back pocket was left full-sized. I glued down the squares with 1/8″ Scor Tape (also sold in my eBay Store) right at edges to give me the most room in the pockets.
A7 Card Mats Frame #2 – I took a 3-1/8″ x about 6″ strip of cardstock and placed the top edge just over this die shape. That gave me a tag with a decorative edge at the top. “treasured memories” twill ribbon is by Creative Impressions. Many of the ribbons used in this project are from Creative Impressions.
Border Scallops – Decorative edge for the pocket

This is the back side of the layer.
Library Pocket & Card #3 – This is the pullout tag for the back pocket
Layer 5
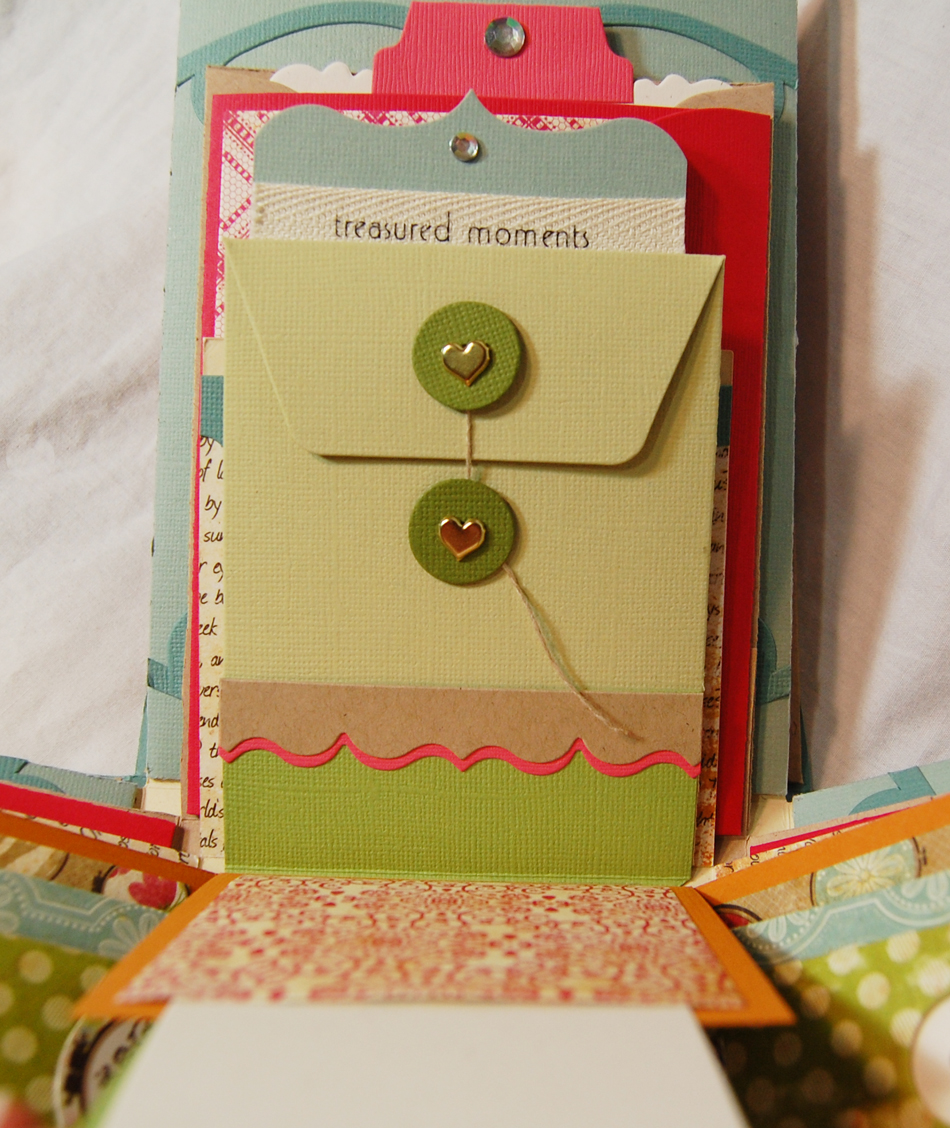
Album Envelopes – Hinged to the outside of Layer 5, is this cute little pocket envelope. I used a simple rectangle, scored in the middle, then glued to the front of the pocket envelope, then to the underside of the layer box base.
Border Scallops – Decorative edge for the medium green hinge

The back side of the pocket envelope, each one has a different 3×4 journaling card
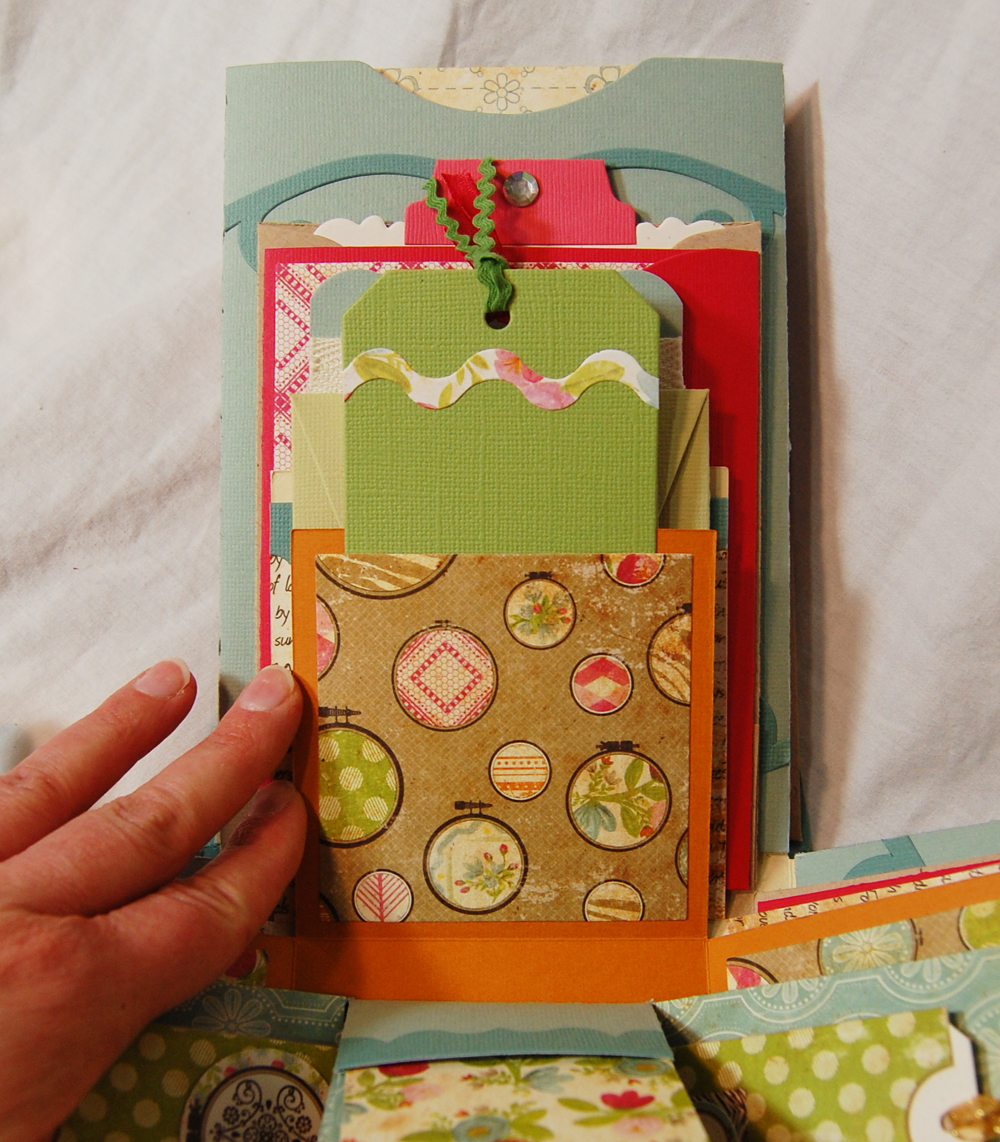
Album Explosion Box – Inner Bottom – This is the main orange base of Layer 5. Pockets were created using the Clear Cuts Mat dies of the set
Gift Tag #3 Large – The green pullout tag
Border Interlocking #1 – decorative rick rack strip at the top of the tag
The back side of the orange box layer, another Gift Tag #3 is used at the pullout tag
Layer 6
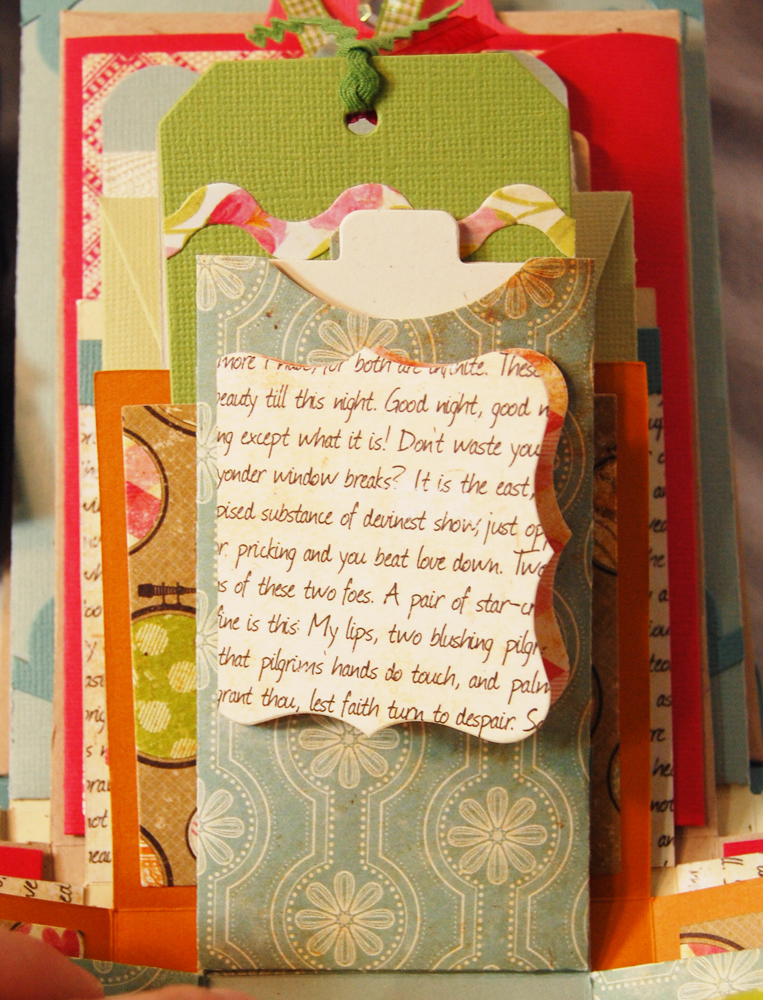
Layer 6 box base – I hand-cut this with my Scor-Pal Scor board. First I cut a square 5-1/2″, then scored it at 1-1/2″ and at 4″, turned it 90 degrees and scored it at the same measurements. Then with scissors I cut out the four corners, but left about 3/8″ strip attached to each side of the fold line so that when I folded in the 1-1/2″ x 2-1/2″ flaps, those strips would help create a pocket on the back side of the box/layer sides. This will give you an explosion box base that is 2-1/2″ wide (matches the Pocket Notch & Tag width), and the four flaps are 1-1/2″ x 2-1/2″.
Pocket Notch & Tag #1 – glued to the inside of the layer box base, this helps for the sides of the box layer
Antique Accents – I place a folded piece of patterened paper right on the inside line of the smallest frame shape, and the gave me a foldout mini card

A view of the back side. You can see the pocket created by the box base and the pocket die cut.
Border Scallops Decorative – decorative edge on the back pocket
Layer 7

Layer 7 box base – I hand-cut this with my Scor-Pal Scor board. First I cut a square 7-5/8″, then scored it at 3″ and at 4-5/8″, turned it 90 degrees and scored it at the same measurements. Then with scissors I cut out the four corners. This will give you an explosion box base that is 1-5/8″ wide (matches the Pocket shape from the album die set), and the four flaps are 1-5/8″ x 3″.
Album 5-1/2″ x 5-1/2″ #2 – The pocket shape from this set forms the back and front of this layer.
Gift Tag #3 Small – the pullout tags for the pockets
Spiral Flowers – the 3d rose in the middle
Holiday Flowers – I used this shape to make the leaves.
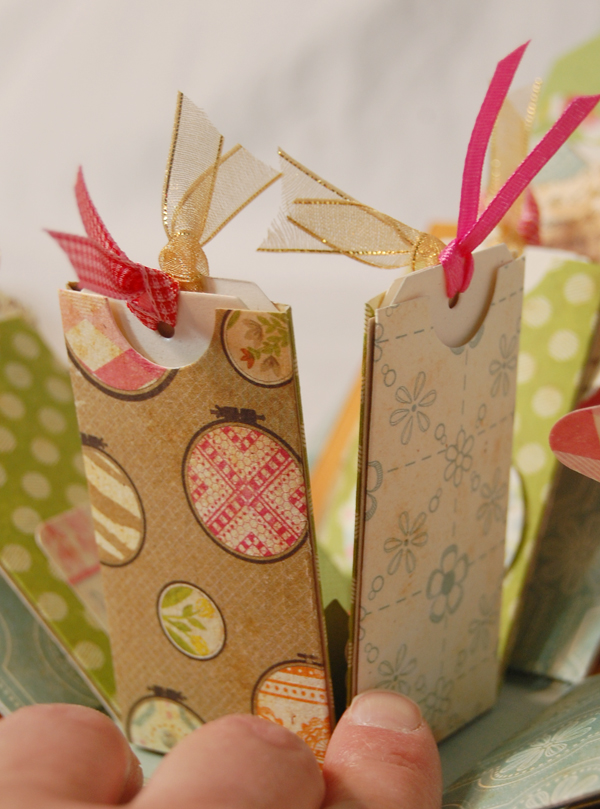
The back sides of the layer, used different patterned papers on each side.
Whew! That does it, a full description of the dies used in this project. Please leave a comment if you liked my project or if you have any questions. Thanks so much for looking!
Becky